In This Article
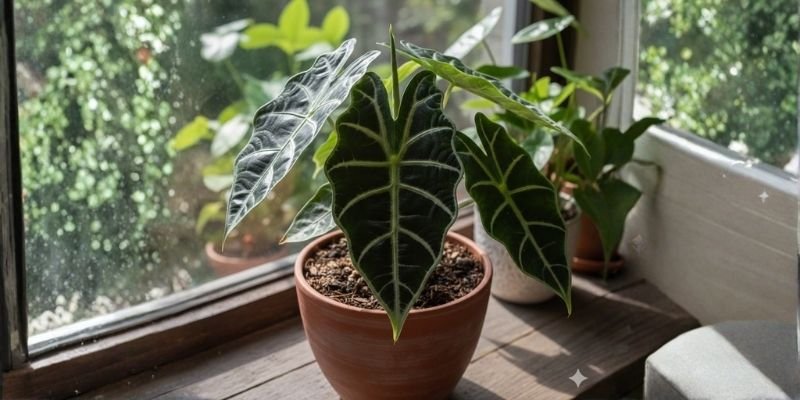
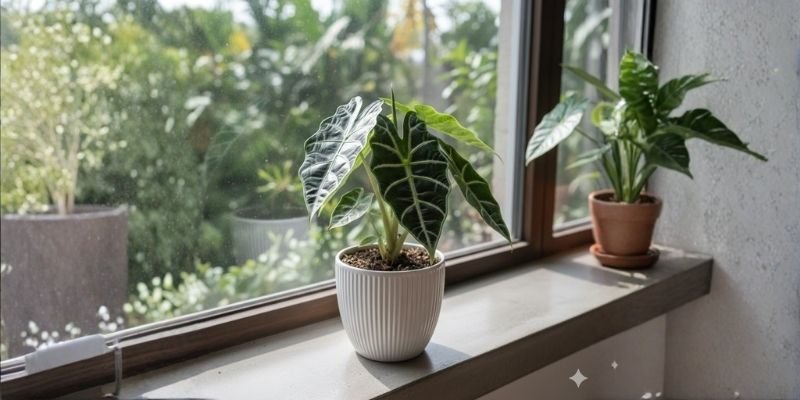
Hello, other people who love plants! If you’ve ever walked into a room and stopped in your tracks because of a plant with huge, shiny leaves that look like they belong in a rainforest, you’re probably looking at an Alocasia. These beautiful tropical plants, which are often called “elephant ears” because their leaves are so big and shaped like arrows, have become very popular with indoor gardeners. I’ve been taking care of Alocasia plants at home and in greenhouses for 15 years, and I’ve seen how they can turn regular spaces into lush, exotic getaways. Alocasia adds a dramatic touch that is hard to resist, whether you’re just starting out with houseplants or are an experienced collector looking for the next big thing. Their bold leaves, veined patterns, and upright growth make them great for bringing a little bit of the tropics into your home or office. But believe me, they’re not just pretty faces. With the right care, they will grow quickly and you’ll enjoy watching them thrive.
To give you a quick snapshot of what makes Alocasia tick, here’s a handy plant information table based on my hands-on experience with dozens of varieties:
Field | Details |
Botanical Name | Alocasia spp. |
Common Name | Elephant Ear, African Mask |
Plant Type | Tropical perennial herb |
Mature Size | 1-6 feet tall, depending on variety |
Leaf Style | Arrow-shaped or heart-shaped, often with prominent veins and textures |
Light Requirement | Bright indirect light; avoid direct sun |
Soil Type | Well-draining aroid mix with perlite or bark |
Water Needs | Moderate; keep soil moist but not soggy |
Humidity Requirement | High (50-70%); mist or use humidifier |
Temperature Range | 65-85°F (18-29°C); avoid drafts below 60°F |
Maintenance Level | Moderate to high; requires attention to humidity and watering |
What is Alocasia?
Alocasia is part of the Araceae family, which is a huge group that also includes philodendrons and monsteras, which are also popular plants. These plants come from the humid rainforests of Southeast Asia, Australia, and some parts of the Pacific. They have adapted to living in warm, shady understories where there is a lot of moisture. Alocasia grows in the wild from rhizomes or corms that are underground. These rhizomes or corms send up those famous large leaves on long petioles that can reach several feet. I have grown them in greenhouses that mimic these conditions, and they act a lot like herbaceous perennials: when they are stressed, they die back in cooler seasons, but when they are happy, they bounce back with energy. Alocasia is different from other plants because it has more than 90 species, each with its own unique leaf shape, color, and texture. Some are velvety black and others are shiny silver. They’re not real bulbs; they’re rhizomatous, which means they spread slowly through offsets. This makes them fun to grow.
Why should you grow Alocasia inside?
It’s not just about how Alocasia looks in your home; their big, bold leaves always steal the show. I’ve been gardening indoors for a long time, and I’ve found that Alocasia plants are great at cleaning the air. They remove toxins and add oxygen to rooms that are too stuffy. Their tropical vibe instantly makes any room look better, turning a boring corner into a conversation starter. For collectors like me, Alocasia has an endless range of plants. Finding rare cultivars feels like a treasure hunt, and watching them grow new leaves is pure joy. They’re also pretty small for how much of an effect they have, which is great for apartments where space is limited but you want a lot of drama. Taking care of Alocasia also teaches you to be patient and pay attention, which will help you improve your gardening skills. I’ve seen them make people feel better in home offices, giving them a biophilic connection to nature even when it’s raining.
Popular Alocasia Varieties
I’ve tried out a lot of different types of Alocasia over the years, and each one has added something special to my collection. Alocasia Zebrina is easy to spot because its stems look like zebra legs and its leaves look like arrowheads that sway gracefully. Then there’s Alocasia Frydek, which has beautiful white veins on velvety green leaves. It’s like a living piece of art. Alocasia Dragon Scale has scaly, iridescent leaves that shimmer in the light, and Alocasia Black Velvet has deep, almost black leaves that feel soft and fuzzy and are hard to resist touching. If you have a small space, Alocasia Maharani is a great choice because it is small and has silvery-gray leaves. Don’t forget about Alocasia Polly (or Amazonica), which has glossy, shield-like leaves with white edges. I also love Alocasia Cuprea, which has a shiny copper color that looks like it came from another world. There are small differences in how to care for each type, but they all have that strong Alocasia look.
Seasonal Care Calendar
Caring for Alocasia shifts with the seasons, just like in their native tropics. Here’s a simple table outlining key tasks based on what I’ve learned from years of seasonal adjustments:
Season | Care Tasks |
Spring | Repot if needed; increase watering as growth resumes; fertilize lightly; check for pests after winter. |
Summer | Provide extra humidity; water more frequently; move to brighter spots if leaves stretch; prune dead foliage. |
Fall | Reduce watering; ease off fertilizer; prepare for potential dormancy by keeping warm. |
Winter | Minimize watering to prevent rot; boost humidity with trays; avoid cold drafts; monitor for spider mites. |
How To Plant And Care For Alocasia
At first, planting and taking care of Alocasia may seem hard, but if you do it right, these tropical plants will do well inside. Over the years, I’ve grown hundreds of Alocasia, from small offsets to huge plants. The secret is to make their home as much like a rainforest as possible. Let’s go over it step by step so you can get your Alocasia off to a good start and keep it happy for a long time.
Step 1: Choose the Right Indoor Location
Finding the right place for your Alocasia is very important; it’s like setting the stage for its show. From what I’ve seen, Alocasia likes places that are always warm and away from drafts, like near a north-facing window or in a bathroom with natural steam. Don’t put them right next to doors, air vents, or heaters, because sudden changes in temperature can stress them out. I’ve had a lot of success putting Alocasia in living rooms where they get soft light but not direct sunlight. This makes them a natural part of the decor without fading or burning.
Step 2: Provide Bright Indirect Light
Alocasia needs light to live, but too much direct sunlight can burn those lovely leaves faster than you think. Look for bright, filtered light, like what comes through sheer curtains or bounces off walls. I like east-facing windows for morning light without too much afternoon light. If your area is too dark, add grow lights that are 12 to 18 inches away for 10 to 12 hours a day. Look for signs: if your plants are growing leggy, they need more light; if they have bleached spots, they need less. Changing the light has helped my Alocasia grow those huge, bright leaves year after year.
Step 3: Use an Airy, Well-Draining Aroid Soil Mix
Many Alocasia problems start or end with the soil mix. Get this right, and you’re good to go. I always make my own mix of potting soil, perlite, and orchid bark in equal parts to keep the soil from getting too compacted, which can cause rot. For freshness, add a handful of charcoal. This light mix is like the loose forest floor that Alocasia loves, letting the roots breathe while keeping just the right amount of moisture. Don’t use heavy garden soil; it’s a recipe for disaster. This mix has kept my Alocasia plants healthy and happy when I repotted them, without any problems with waterlogging.
Step 4: Planting or Repotting Properly
When you need to plant or repot your Alocasia, which is usually every one to two years in the spring, be careful not to bruise the rhizomes. Pick a pot that is 1 to 2 inches wider than the root ball and has holes in the bottom to let extra water out. Put your aroid mix in the bottom, place the plant so that the rhizome is level with the soil, and press down on the soil around it without packing it too tightly. After that, water it lightly and put it in a place where it won’t get direct sunlight. This is how I’ve repotted a lot of Alocasia plants, and it helps them get used to their new home quickly.
Step 5: Watering Without Overwatering
It takes skill to water Alocasia. Keep the soil moist but not soggy, because too much water can cause root rot. I check the top inch of soil. If it’s dry, I water it well until it drains out the bottom, and then I empty the saucer. To keep the roots from getting shocked, use water that is at room temperature. When I worked in a greenhouse, I learned to water less in the winter when plants stop growing. Always make sure the Alocasia is a little thirsty; it will bounce back better than if it is too wet.
Step 6: Maintaining Warm Temperatures and High Humidity
Alocasia comes from jungles that are very hot and humid, so you should keep the temperature between 65 and 85 degrees Fahrenheit and the humidity above 50%. I put water-filled pebble trays under pots or group plants together to make a microclimate. A humidifier is a game-changer in dry winters; my Alocasia leaves stay crisp and don’t turn brown at the tips. Keep them away from windows when it’s cold outside because I’ve lost a few to cold snaps. This mix of warmth and moisture helps them grow quickly.
Step 7: Feeding and Fertilizing During Growth
In the spring and summer, when your Alocasia is growing, give it fertilizer to get those big leaves. I mix a balanced, liquid fertilizer for houseplants with water to make it half as strong and use it every four to six weeks. Choose one with a lot of nitrogen to make the leaves grow. Don’t do it in the fall and winter when they’re sleeping. I’ve seen Alocasia that didn’t get enough food stay small for a long time. But if you feed them the right amount, they can grow into giants. Just don’t give them too much, or the salt will build up.
Step 8: Pruning, Cleaning, and Leaf Care
To keep your Alocasia looking sharp, use clean shears to cut off any yellow or damaged leaves at the base. This will redirect energy. Wipe the leaves with a damp cloth once a week to get rid of dust, which will help photosynthesis and keep pests away. Regular cleaning has kept the leaves shiny and stopped problems in my collection. It’s normal for leaves to split on their own; Alocasia does this to protect itself from wind in the wild.
Step 9: Long-Term Alocasia Care and Maintenance
Check your Alocasia every few weeks for new leaves to see if it’s happy. If it is, you’re on the right track. Check the roots when you repot and turn the pot every three months for even growth. Some Alocasia go dormant in the cooler months as they get older. You should cut back on care and wait for spring to bring them back to life. With regular care, my oldest Alocasia plants have lived for more than ten years and have become family heirlooms of sorts.
Problems and Solutions That Happen Often
Alocasia can still run into problems, even when you mean well. If your leaves are turning yellow, it could be because you’re watering too much or the drainage isn’t good. Cut back on the water and check the roots for rot. If they are, repot them. If your plants are drooping, it could be because they aren’t getting enough water or the air is too dry. Mist them and water them deeply. Root rot, which is deadly in wet soil, needs to be trimmed and a new mix made. Spider mites and other pests love dry air. Use neem oil or hose down the leaves. Dormancy is not a problem; it’s just a time to rest. Keep the soil just barely moist until growth starts again. I’ve dealt with these in my greenhouses, and early action always works.
Things Beginners Shouldn't Do
People who are new to Alocasia often give them too much love, which makes the roots mushy. Another is not giving enough moisture, which makes the edges crispy. Don’t forget about their light needs; they get leggy in dim places. Using the wrong soil, such as a thick potting mix that doesn’t drain, can cause problems. Finally, if you don’t let new plants from stores get used to their new home, they may get shocked. Take it slow and watch what happens, like I did at first.
Advice from experts on how to get bigger leaves and faster growth
To give your Alocasia a boost, set up a terrarium for young plants to raise the humidity. In cooler areas, use bottom heat mats to keep roots healthy. Try using organic fertilizers like worm castings to get nutrients from nature. Cut back on pruning so you can put more energy into new growth. In my experience, keeping the humidity at 70% and feeding the plants evenly makes the leaves twice as big. Patience pays off.
Ways to spread (division and corm offsets)
It’s easy and rewarding to propagate Alocasia. When repotting, carefully divide the rhizomes so that each one has roots, and then plant them in a new mix. You can pick corm offsets, which are the bulb-like pups, from the base. Let them callus for a day, then put them in moist soil in a pot that gets indirect light. This is how I’ve grown my collection, and it works really well in humid propagators.
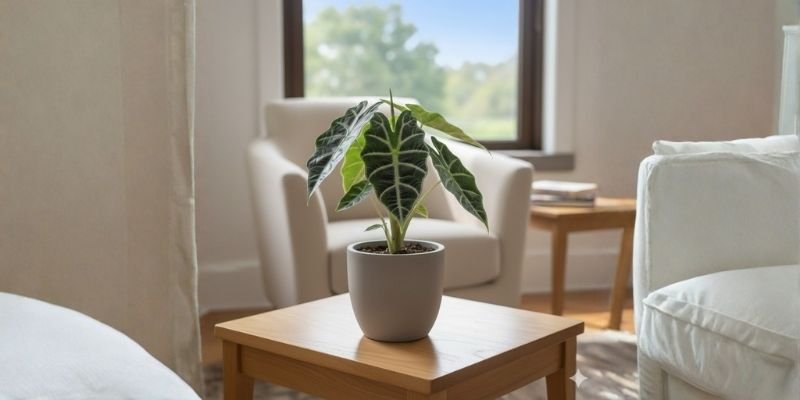
Ideas for how to style and place home decor
Alocasia looks great in decor. For a contrast, pair a tall Zebrina with modern furniture. For texture, group smaller types like Black Velvet on shelves. They love the humidity in bathrooms, which makes them thrive and gives the room a spa-like feel. Put leaves on high stands to show them off, or mix them with ferns to make a jungle corner. People always say nice things about how I set up my home. Alocasia makes any room look better without any effort.
To sum up, Alocasia is a very rewarding tropical plant that adds a touch of exotic beauty and a sense of accomplishment to any indoor gardener. They’re worth the work because their leaves are so beautiful and they can handle a lot.
FAQs –
1. How often do I need to give my Alocasia water?
The amount of water you need to give Alocasia depends on where you live, but in general, you should water it when the top inch of soil feels dry. In the summer, when the rooms are brighter and warmer, this could be every 5 to 7 days. In the winter, when the rooms are cooler, it could be every 10 to 14 days. To keep water from pooling, always use a pot with drainage. Also, keep in mind that overwatering is worse than underwatering. I’ve been growing Alocasia for a long time, and I’ve found that the best way to tell when to water them is to stick your finger in the soil.
2. Why are the leaves on my Alocasia turning yellow?
There are a few reasons why Alocasia leaves turn yellow, but the most common one is inconsistent watering. Too much water can cause root rot, and too little water can cause stress. Check the roots for mushiness. If they are rotten, cut them off and put them back in fresh, well-draining soil. Low light or a lack of nutrients can also be a problem. Make sure there is bright, indirect light and fertilize during the growing seasons. In my greenhouse, sudden temperature drops or drafts have the same effect, so keep your Alocasia stable.
3. Can Alocasia grow in the dark?
Alocasia likes bright, indirect light best, but some types, like Black Velvet, can handle lower light better than others. However, growth will slow down and the leaves may stretch. Stay away from deep shade because it makes the plant weaker over time. I’ve grown Alocasia in offices with medium light and extra LED grow lights, but for the best health, the leaves should get at least 4–6 hours of filtered sunlight every day.
4. What can I do to make the air more humid for my Alocasia?
To keep the tips from turning brown, you need to raise the humidity around Alocasia. One way to do this is to put the pot on a tray of pebbles with water, making sure the base doesn’t sit in it. You can make a humid microclimate by putting plants together, or you can use a room humidifier set to 60%. It’s good to mist the leaves every day, but don’t do it too much or you could get fungus. I’ve used closed cabinets with hygrometers in my home setups to keep an eye on and control the levels, which has made my Alocasia happier and healthier.
5. Is dangerous for pets?
Yes, Alocasia has calcium oxalate crystals in it that can hurt mouths and make them swell up if pets or kids eat them. Keep them away from them. If your pet starts drooling or throwing up, you should call a vet right away. As someone who has grown plants for a long time and has cats, I’ve put my Alocasia on high shelves or used barriers. Luckily, most pets leave them alone once they find out the leaves aren’t tasty.
6. When is the best time to repot my Alocasia?
Every one to two years in the spring, when the roots fill the pot or poke out the bottom, it’s time to repot. To refresh the nutrients, pick a container that is a little bigger and add new aroid mix. Gently pull apart the roots to help them spread, but don’t do it too much to avoid shocking them. From all the times I’ve repotted, I’ve found that doing this while the plant is growing helps it recover quickly and grow new leaves.
7. How can I tell if my Alocasia is going to sleep?
When Alocasia goes dormant, its older leaves turn yellow, its growth slows down, and sometimes all of its leaves die back in the cooler months. This is a natural rest phase, not death. Keep the soil barely moist and the temperature above 60°F. In the spring, new shoots will grow. I’ve taken care of a lot of plants in greenhouses by putting rhizomes in peat moss if I needed to, and they always come back strong.
8. What kinds of bugs do plants usually have?
Spider mites, aphids, and mealybugs are common pests. They like dry conditions and leave leaves with spots or webs. Check the undersides often and spray them with neem oil or insecticidal soap every few days until they are clear. Put new plants in quarantine so they don’t spread. In my experience, keeping the humidity high keeps most pests away, but finding them early has saved many Alocasia from serious damage.