In This Article
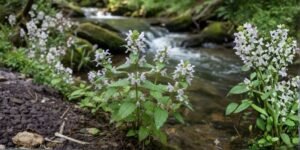
Hey, gardeners! Remember the bliss of a ripe, buttery pear, still warm from the sun? Bartlett Pear Trees, or Williams Pear Trees, as they’re often called, are those old-school varieties that conjure up memories of summer’s bounty and jars of homemade jam. You know the ones: that golden-yellow color when they’re ready, the sweet, fragrant flesh that’s just right for eating, preserving, or turning into a pie. So, why go through the trouble of growing a Bartlett or Williams from seed, when you could just pick up a young tree at the nursery?
Honestly, after more than fifteen years of cultivating backyard orchards, I’ve come to appreciate the simple joy of watching something flourish from the ground up. It’s a more economical choice, and it gives you the freedom to play around with rootstocks tailored to your specific soil. It also teaches you a thing or two about patience—much like seeing a child grow. Starting from seed can also yield resilient trees, perfectly suited to your local climate, even if it means waiting a bit longer for that first harvest. Not everyone has the room or the time for a sprawling orchard, but even a single Bartlett Pear Tree can turn a sun-drenched spot in your yard into a fruitful little paradise.
Before we dive into the how-to, let’s get some basics down. Here’s a quick reference table on the key details for Bartlett Pear Trees (or Williams Pear Trees, as they’re called across the pond).
Botanical Name | Pyrus communis ‘Bartlett’ (also known as ‘Williams’ Bon Chrétien’) |
Common Names | Bartlett Pear Tree, Williams Pear Trees |
Plant Type | Deciduous fruit tree |
Mature Height & Spread | 15-20 feet tall, 12-15 feet wide (can be pruned smaller for backyards) |
Climate Requirement | USDA zones 5-8; prefers temperate climates with cold winters for dormancy |
Sun Requirement | Full sun (at least 6-8 hours daily) |
Soil Type | Well-drained, loamy soil; pH 6.0-7.0 |
Water Needs | Moderate; about 1-2 inches per week, more during fruiting |
Time to Fruit | 3-5 years from seed (longer than grafted varieties) |
Maintenance Level | Medium; requires pruning, pest monitoring, and occasional feeding |
This table should give you a solid overview—I’ve grown dozens of these over the years, and they thrive when you match these conditions.
How To Grow Bartlett Pear Trees (Williams Pear Trees) From Seed

Growing a Bartlett Pear, or Williams Pear, tree from seed isn’t exactly a complex undertaking, though it does demand some effort and, frankly, patience. I’ve done this myself, many times over, in my own orchard. While it’s not the fastest route—certainly slower than planting a grafted sapling—the payoff is significant. You get a tree that’s truly your own, and it might even be better suited to your specific pests and climate. So, let’s go through the process, step by step, drawing on what I’ve learned through my own experiences in the garden.
Step 1: Collect Healthy Pear Seeds
The path to a flourishing Bartlett Pear Tree starts with the right seeds, and believe me, not every pear is suitable for this endeavor. Late summer is the time to visit your local market or farmer’s stand, when Williams Pear Trees are bearing fruit. Those ripe, aromatic Bartletts are perfect. Choose pears that are fully developed, yielding to gentle pressure but not mushy or blemished, since damaged fruit can harbor diseases. Cut open a few pears—I typically use five to ten to get a good amount—and extract the seeds from the core.
Look for seeds that are full, a deep brown, and show no signs of decay. From what I’ve seen, seeds from organic or homegrown Bartlett Pear Trees tend to germinate more reliably. This is probably because they’re less likely to have been subjected to growth inhibitors. Gather at least 20 or 30 seeds; not every one will take, a little reminder from nature. Keep them in a paper towel, in a cool place, until you’re ready to move forward. I’ve lost whole batches because they dried out too quickly, so don’t let them sit around for weeks on end.
Step 2: Clean and Prepare the Seeds
After you’ve extracted the seeds from those delicious Bartlett pears, the next step is crucial: cleaning them to prevent decay when they start to sprout. A rinse under cool water will do the job, removing any remaining pulp. I usually find that a light touch with my fingers is enough, and it won’t harm the seed coat. Then, gently dry with a clean cloth. Don’t let them dry out completely, though; a little moisture is beneficial. Some people choose to soak the seeds overnight in lukewarm water to soften the outer shell. I’ve used this method with Williams Pear Trees seeds when they’ve been particularly difficult.
Give each one a second look, checking for any imperfections. If something seems amiss, get rid of it. This initial step is crucial for robust sprouts, and from what I’ve seen in my orchard experiments, neglecting it frequently resulted in fungal problems later on. It’s a straightforward process, but it significantly impacts the health of your future Bartlett Pear Tree.
Step 3: Cold Stratification for Germination
Pear seeds, particularly those from Bartlett or Williams pear trees, require a period of cold to wake up. It’s a survival mechanism, a response to the seasons. This cold stratification process simulates the natural chill. To do it, combine your cleaned seeds with slightly moist sand or peat moss inside a sealed plastic bag or container. Then, place it in the refrigerator, ideally between 34 and 40 degrees Fahrenheit, for a period of 60 to 90 days. I’ve used this method on hundreds of seeds, checking them every couple of weeks to make sure the mixture remains damp but not overly wet. If it seems dry, a quick spray of water will do the trick.
In regions with milder winters, such as parts of zone 8, you may require the full 90 days. Further north, however, 60 days is frequently adequate. This phase is essential; without it, the seeds simply won’t sprout. When you observe those initial rootlets emerging – the radicles, as they’re known – it’s time to get them in the ground. That first glimpse of life after the waiting period is always a thrill.
Step 4: Preparing Pots or Seed Trays
Once you’ve got your stratified seeds ready, it’s time to create a welcoming indoor environment for them. I usually go for small pots or seed trays, using a sterile seed-starting mix. The key is something light and well-draining to avoid damping-off, a disease that’s taken out seedlings in my experience. If your mix seems a bit dense, consider adding perlite or vermiculite. A bleach rinse to sterilize the containers is a good idea, killing off any hidden pathogens. It’s an extra step, but it’s worth it, especially for Bartlett Pear Tree seedlings. Fill the containers to about an inch from the top, and gently press down to eliminate any air pockets. If you’re starting several Williams Pear Trees, be sure to label them. I once mixed up varieties and ended up with an unexpected apple seedling! This setup gives the seeds the best chance to develop robust roots before they’re ready to brave the outdoors.
Step 5: Planting the Seeds at the Right Depth
Getting the planting depth just right is crucial for successful germination. Make holes in your prepared mix, aiming for a depth of about half an inch to an inch. If they’re too shallow, the seeds will dry out; too deep, and they’ll have a hard time breaking through. Drop a seed into each hole, root side down if it’s already started to sprout, and then lightly cover it with soil. I’ve used this method for Bartlett Pear Tree seeds many times, spacing them two to three inches apart in trays to allow for good airflow. A light misting of the surface will help settle everything, but avoid soaking it. Williams Pear Trees can be a bit temperamental, so I sometimes cover the trays with plastic wrap to create a mini greenhouse, trapping humidity until the sprouts appear, usually within two to four weeks. Patience is key here; if you try to rush things, you’ll likely end up disappointed when a good portion of them fail to germinate.
Step 6: Providing Light, Water, and Warmth
With your seeds safely in their beds, it’s time to cultivate the ideal nursery. Find a warm location for the pots, ideally between 65-75°F. A sunny windowsill works well, or you can use grow lights if your home lacks natural light. I use fluorescent lights, positioned about six inches above the pots, and keep them on for 14-16 hours daily to replicate the sun’s springtime intensity. Water ensuring the soil is moist but not waterlogged. I check the soil daily with my finger, and I water from the bottom to avoid disturbing the seeds. When your Bartlett Pear Tree seedlings begin to sprout, thin them out if they’re overcrowded, leaving only the healthiest ones.
Leggy growth is a telltale sign; if they’re reaching for the sky, they’re probably not getting enough light. In my experience with Williams Pear Trees, this initial phase typically lasts four to six weeks before they’re ready for the next step. It’s a satisfying moment when those first real leaves finally appear.
Step 7: Transplanting Young Seedlings Outdoors
Once your seedlings boast four to six true leaves and the threat of frost has vanished—generally, this is springtime in growing zones 5 through 8—it’s time to get them ready for the great outdoors. Begin the process of hardening them off. This means gradually introducing them to the outside world over the course of a week. Start with a few hours of shade, then slowly increase their exposure to full sun. This helps strengthen those delicate stems. Next, prepare your planting site. Dig holes that are twice the width of the root ball. Enrich the soil with compost to give your plants a nutritional boost. When you’re ready to plant, make sure the seedlings go in at the same depth they were in their pots. If you’re planting several Williams Pear Trees, space them 15 to 20 feet apart.
Water thoroughly right after planting, and then spread wood chips around the base. This will help keep the soil moist and keep weeds at bay. I’ve seen a few Bartlett Pear Tree seedlings succumb to transplant shock, so take your time and keep an eye out for any signs of wilting. This is the crucial transition from being a pampered indoor plant to an outdoor one that can thrive.
Step 8: Caring for Young Bartlett Pear Tree Growth
Young Bartlett pear trees need a bit of TLC to flourish. The first year is all about consistent watering. Make sure they get a thorough, deep drink every five to seven days, and more frequently if the weather is hot and dry. This helps establish a strong root system. A light application of balanced fertilizer, like a 10-10-10 mix, in the spring is a good idea, but don’t go overboard. Too much nitrogen can lead to lots of leaves, but fewer pears down the line.
If wind is a concern where you live, staking the trees is a good idea. To keep deer and rabbits at bay, fencing is a must; I’ve had good luck with chicken wire. Pruning should be minimal right now; just take out any dead or damaged branches. With my Williams pear trees, I’ve learned that keeping a close watch for pests is key. Watch for aphids or codling moths, and use organic sprays like neem oil if you spot them. By the second year, you’ll see them really take off, which is a nice reward for your efforts.

Step 9: Long-Term Care, Pruning, and Fruit Development
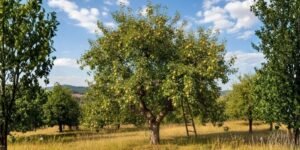
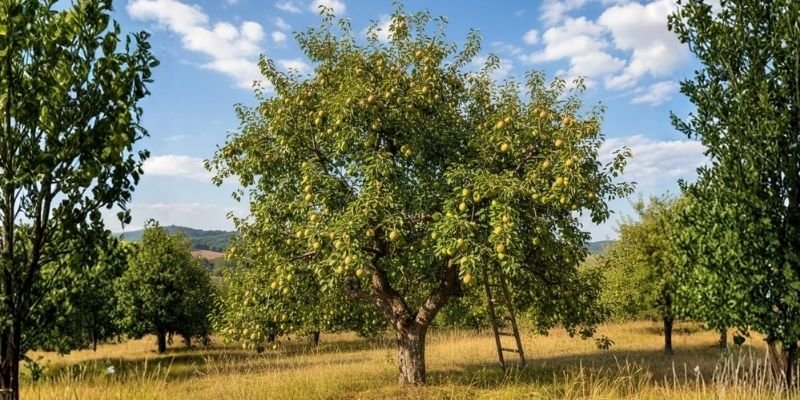
As your Bartlett Pear Tree grows, it’s time to think long-term about keeping it healthy and productive. Prune it every year in late winter. An open center style is ideal; it allows for better airflow and sunlight, which helps prevent diseases like fire blight—something I’ve had to deal with during particularly humid seasons. Thin out the branches, leaving one every six to eight inches, and always cut back to a bud. Fertilize sparingly, and always test the soil first; compost mulch is a great natural feed. Pollination is essential. Plant another pear variety nearby for cross-pollination, since Williams Pear Trees aren’t completely self-fertile. You can expect your first fruits in about three to five years. Thin the clusters to one or two per spur to get bigger pears. Harvest them when they’re yellow-green and a little soft; they’ll ripen off the tree. Over the years, my Bartlett Pear Trees have given me bushels of fruit with this care, transforming my yard into a pear paradise.
Conclusion
Growing Bartlett or Williams pear trees from seed requires a certain level of patience; it’s not the quick fix of buying a ready-made plant from a nursery. However, the payoff is substantial. You’ll end up with a resilient tree, perfectly suited to your yard, and you’ll feel a swell of pride when you see those first pears appearing. Stay the course, and you’ll cultivate a fruit tree that can be enjoyed for years to come.
FAQs –
1. How long does it really take for a Bartlett Pear Tree grown from seed to produce fruit?
Based on what I’ve seen, you’re looking at a minimum of three to five years, and possibly up to seven if things aren’t quite right. Trees grown from seed aren’t grafted onto those dwarfing rootstocks you find in stores, which means they’ll be taller and take longer to bear fruit. A lot depends on the soil, how much sun they get, and whether they’re properly pollinated. You can help things along with good care from the start, but keep in mind that patience is part of the deal – it builds character, both for the tree and for you.
2. Do Williams Pear Trees need a pollinator to bear fruit?
They’re definitely not self-sufficient when it comes to pollination. I’ve had the best luck with mine by planting them close to other pears that bloom early, such as Bosc or Comice. Bees are the real MVPs, but if there’s no compatible tree within about 50 feet, the fruit set suffers. If you’re short on space, you might think about grafting a pollinator branch onto your tree down the line. This is a frequent problem in smaller yards, but a little foresight can save you from a disappointing harvest.
3. What common problems affect Bartlett Pear Tree growth, and how do I fix them?
Fire blight is a major concern; it’s bacterial and manifests as blackened shoots. When you find it, prune away the affected areas, cutting at least twelve inches below where you see the symptoms, and be sure to disinfect your tools afterward. Codling moths are another problem, as they tunnel into the fruit itself. Traps or introducing beneficial insects can help control them. Root rot is often caused by poor drainage, so if you’ve got clay soil, amending it with sand is a good idea. In my own orchard, I’ve found that a combination of good airflow and resistant practices keeps problems to a minimum. Regular inspections are the most effective way to stay ahead of things.
4. Can I grow Williams Pear Trees in containers if I don’t have much yard space?
Yes, if you can, opt for dwarf rootstocks, though those grown from seed might eventually outgrow their pots. Begin with 5-gallon containers, and move them up as necessary, using a well-draining mix. These plants thrive in full sun and need shelter from the wind. I’ve kept younger ones in pots for a couple of years before moving them out—perfect for apartments. However, for the long haul, they do better in the ground, where they can develop deeper roots and gain more stability.
5. Is grafting necessary for seed-grown Bartlett Pear Trees?
Not a hard and fast rule, but many folks do it to guarantee the fruit’s quality, since seedlings can be unpredictable. If your tree is cranking out disappointing pears, consider grafting scions from a reliable Bartlett onto it after a couple of years. I’ve had good luck with the whip-and-tongue method in the spring; it’s a handy skill if you’re looking to expand your orchard, though ungrafted trees can sometimes surprise you with a respectable harvest.
6. How do I protect young Williams Pear Trees from winter damage?
Wrap tree trunks with burlap or use tree guards to protect them from sunscald and rodents. Apply a thick layer of mulch around the base to insulate the roots; I’ve found straw works well, up to four inches deep. In particularly cold areas, consider mounding soil over the graft union, if there is one. A light pruning before winter helps lessen the weight of snow. My trees, located in zone 5, have withstood temperatures as low as -20°F using these methods, and they seem to come back even healthier in the spring.
7. What soil amendments work best for Bartlett Pear Tree health?
Compost reigns supreme. Each year, I mix in well-aged manure or leaf mold to provide nutrients without the risk of burning. If the pH is out of whack, I adjust it: lime for acidity, sulfur for alkalinity. I steer clear of heavy nitrogen; potassium is the focus, especially for fruit quality. In less-than-ideal soils, I’ve found that gypsum improves drainage, resulting in vigorous growth and fewer problems, such as yellowing leaves.
8. Are there organic pest control methods for Williams Pear Trees?
Neem oil sprays are effective against aphids and mites; use them every ten days if you see an infestation. You can also introduce ladybugs to help control pests naturally. For fungal problems like scab, try sulfur-based fungicides, which are organic. Planting marigolds alongside your other plants can keep nematodes away. I’ve been using only organic methods in my yard for years now, and the natural balance seems to keep pests under control without the need for chemicals.